适用场景
个人开发者快速搭建天气查询插件,无需服务器,30 分钟内完成。最终效果:在 Dify 中通过自然语言查询天气,如"北京今天天气如何?"
什么时候需要自定义插件?
- 官方插件没有你想要的功能
- 付费插件费用太贵
- 想连接特定的第三方 API 服务
- 需要对接企业内部系统
自定义插件基本流程
1
脚本开发
基于本地实现 Python 代码开发
2
运行脚本
后台运行 API 服务
3
创建工具
在 Dify 中创建自定义工具
4
Schema 操作
配置 OpenAPI Schema
5
测试
输入参数测试功能
6
保存
在 Agent 中应用插件
以智能天气助手插件的开发为例,完成一个能实时查询天气的插件的自定义。
一、FastAPI 服务搭建
1.1 安装依赖
bash
# 创建虚拟环境(推荐)
python -m venv weather-env
source weather-env/bin/activate  # Linux/Mac
# weather-env\Scripts\activate   # Windows

# 安装依赖
pip install fastapi uvicorn requests
1.2 完整代码实现 (main.py)
python
from fastapi import FastAPI, Request, HTTPException
from pydantic import BaseModel
import requests

app = FastAPI()

# 身份验证令牌(个人使用,简单安全)
VALID_TOKEN = "LEO"

# 城市编码数据(直接硬编码,无需外部文件)
CITY_CODES = {
    "北京": "101010100",
    "上海": "101020100",
    "广州": "101280101",
    "深圳": "101280601",
    "杭州": "101210101",
    "成都": "101270101",
    "武汉": "101200101",
    "西安": "101110101",
    "南京": "101190101",
    "重庆": "101040100",
    "天津": "101030100",
    "苏州": "101190401",
    "郑州": "101180101",
    "长沙": "101250101",
    "青岛": "101120201",
    "大连": "101070201",
    "宁波": "101210401",
    "厦门": "101230201",
    "福州": "101230101",
    "济南": "101120101",
    "合肥": "101220101",
    "南昌": "101240101",
    "昆明": "101290101",
    "南宁": "101300101",
    "贵阳": "101260101",
    "哈尔滨": "101050101",
    "长春": "101060101",
    "沈阳": "101070101",
    "石家庄": "101090101",
    "太原": "101100101",
    "呼和浩特": "101080101",
    "乌鲁木齐": "101130101",
    "拉萨": "101140101",
    "兰州": "101110501",
    "西宁": "101150101",
    "银川": "101170101",
    "海口": "101310101",
    "三亚": "101310201"
}

class WeatherRequest(BaseModel):
    location: str

@app.post("/weather")
def get_current_weather(request: Request, body: WeatherRequest):
    """
    天气查询接口
    - 需要Authorization头认证
    - 返回自然语言格式的天气信息
    """
    # 1. 验证身份
    auth_header = request.headers.get("Authorization")
    if auth_header != f"Bearer {VALID_TOKEN}":
        raise HTTPException(status_code=403, detail="Invalid Authorization header")

    location = body.location

    # 2. 查找城市编码
    city_code = CITY_CODES.get(location)
    if not city_code:
        return {
            "status": "error",
            "message": f"请提供{location}对应的编码方可查询,目前支持的城市:{','.join(CITY_CODES.keys())}"
        }

    # 3. 调用天气API
    url = f"http://t.weather.itboy.net/api/weather/city/{city_code}"
    try:
        response = requests.get(url, timeout=10)
        response.raise_for_status()
        data = response.json()
    except Exception as e:
        return {"status": "error", "message": f"天气服务请求失败: {str(e)}"}

    # 4. 解析天气数据
    try:
        forecast = data["data"]["forecast"][0]
        weather_type = forecast["type"]
        high = forecast["high"].replace("高温 ", "")
        low = forecast["low"].replace("低温 ", "")
        temperature = f"{high}/{low}"

        # 5. 返回自然语言格式
        return f"{location}今天是{weather_type},温度{temperature}"
    except (KeyError, IndexError) as e:
        return {"status": "error", "message": f"天气数据解析失败: {str(e)}"}

# 启动入口
if __name__ == "__main__":
    import uvicorn
    uvicorn.run(app, host="0.0.0.0", port=8081)
1.3 启动服务
bash
python main.py预期输出:
INFO: Uvicorn running on http://0.0.0.0:8081 (Press CTRL+C to quit)
二、公网穿透配置
2.1 安装 localtunnel
bash
# 全局安装
npm install -g localtunnel
2.2 启动穿透服务
bash
# 新开一个终端窗口
lt --port 8081
预期输出:
your url is: https://random-name-123.loca.lt
复制这个 URL(如 https://weather-api-abc123.loca.lt)
重要:保持这个终端窗口开启,关闭后链接失效。
三、服务测试验证
Postman 测试
- 创建 POST 请求
- URL:
https://your-url.loca.lt/weather - Headers:
Headers
Authorization: Bearer LEO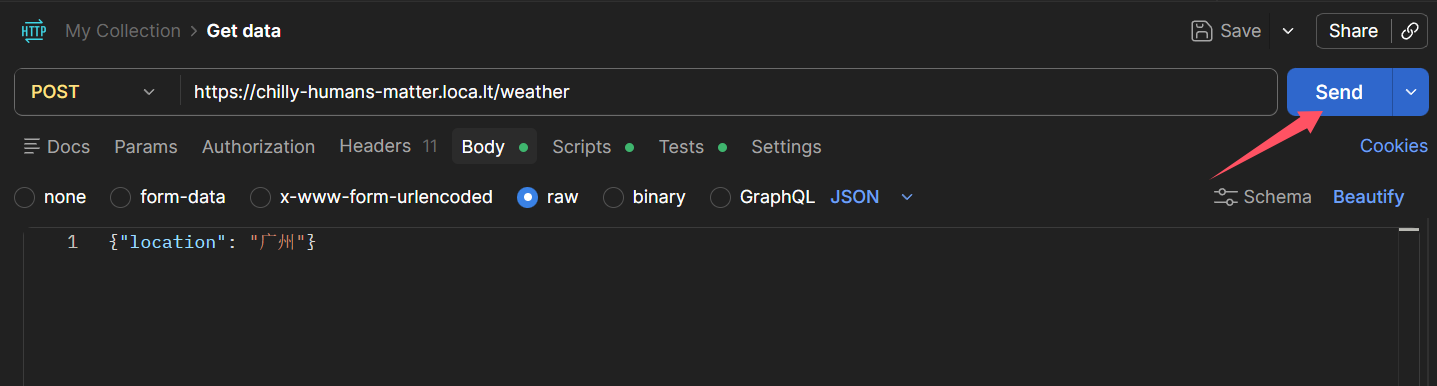
Content-Type: application/json- Body (raw, JSON):
json
{"location": "广州"}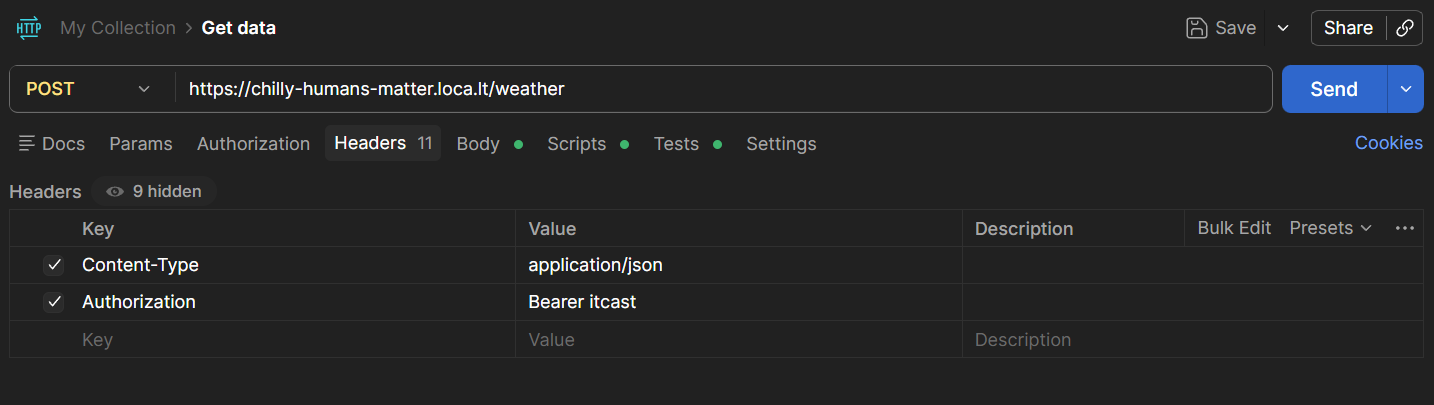

四、Dify 插件配置
4.1 OpenAPI 3.1.0 Schema
json
{
  "openapi": "3.1.0",
  "info": {
    "title": "天气查询API",
    "description": "查询中国城市当前天气信息",
    "version": "v1.0.0"
  },
  "servers": [
    {
      "url": "https://weather-api-abc123.loca.lt"
    }
  ],
  "paths": {
    "/weather": {
      "post": {
        "summary": "查询城市天气",
        "security": [
          {
            "BearerAuth": []
          }
        ],
        "requestBody": {
          "required": true,
          "content": {
            "application/json": {
              "schema": {
                "type": "object",
                "properties": {
                  "location": {
                    "type": "string",
                    "description": "城市名称",
                    "example": "北京"
                  }
                },
                "required": ["location"]
              }
            }
          }
        },
        "responses": {
          "200": {
            "description": "成功获取天气信息"
          }
        }
      }
    }
  },
  "components": {
    "schemas": {},
    "securitySchemes": {
      "BearerAuth": {
        "type": "http",
        "scheme": "bearer"
      }
    }
  }
}
4.2 Dify 插件创建步骤
1
登录 Dify 控制台
访问 https://cloud.dify.ai,选择你的工作空间。
2
创建插件
导航到「插件」→「创建插件」→ 选择「OpenAPI」类型 → 点击「下一步」。
3
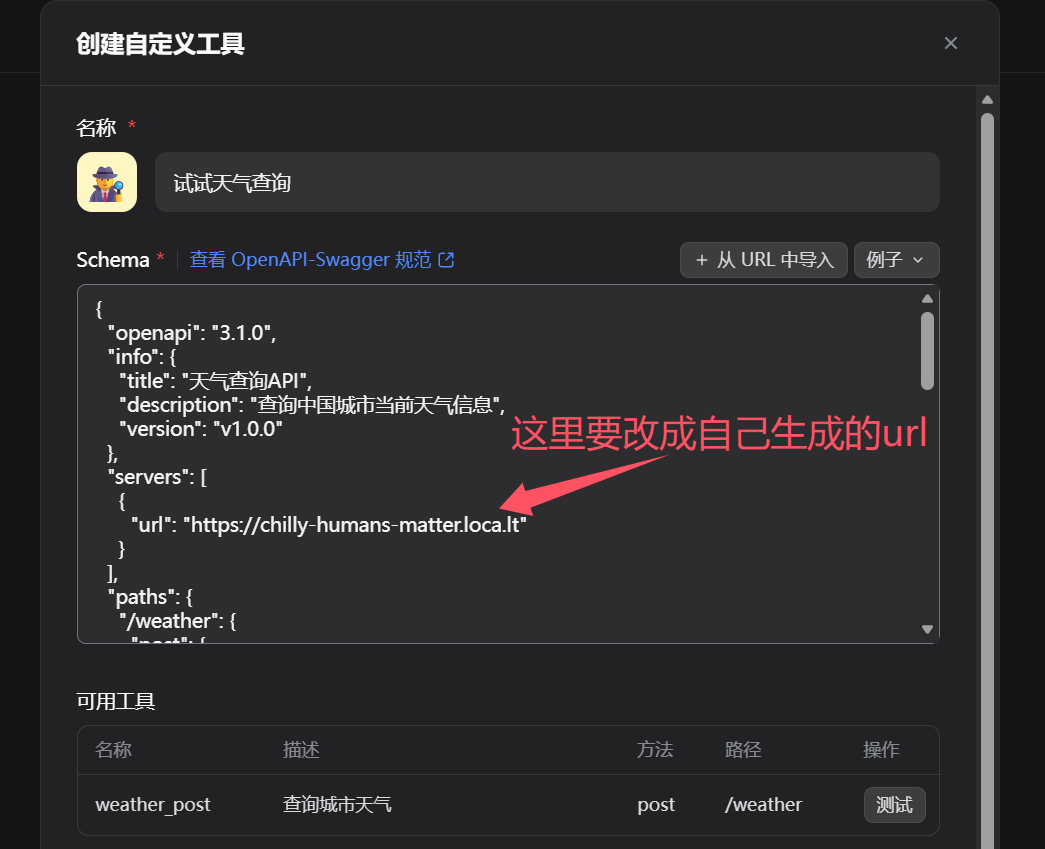
配置 OpenAPI Schema
将上面的 JSON Schema 完整复制到编辑器中。
关键步骤:替换 servers.url 为你的 localtunnel URL。
4
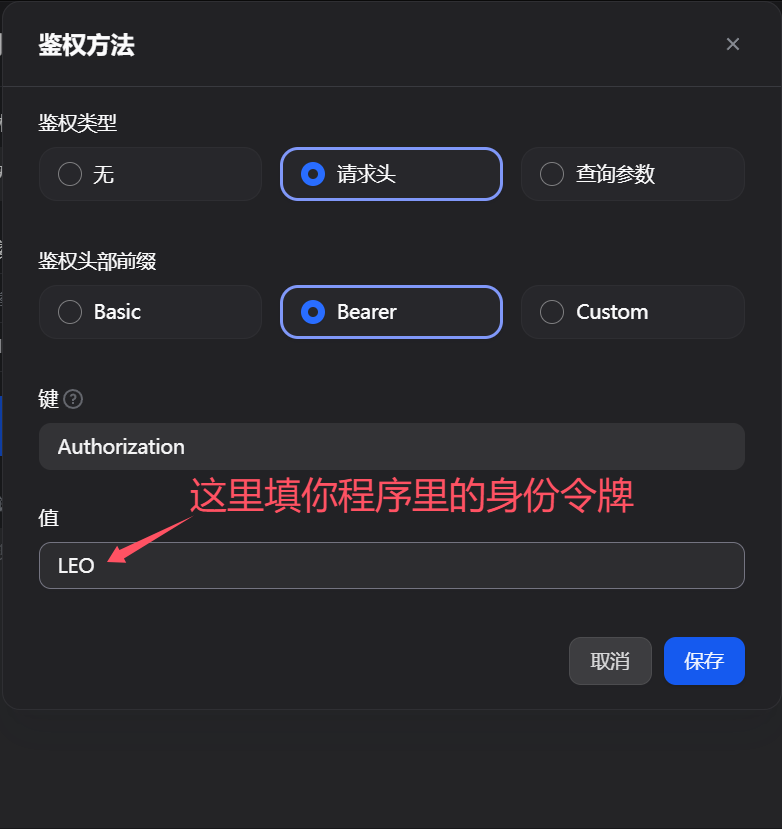
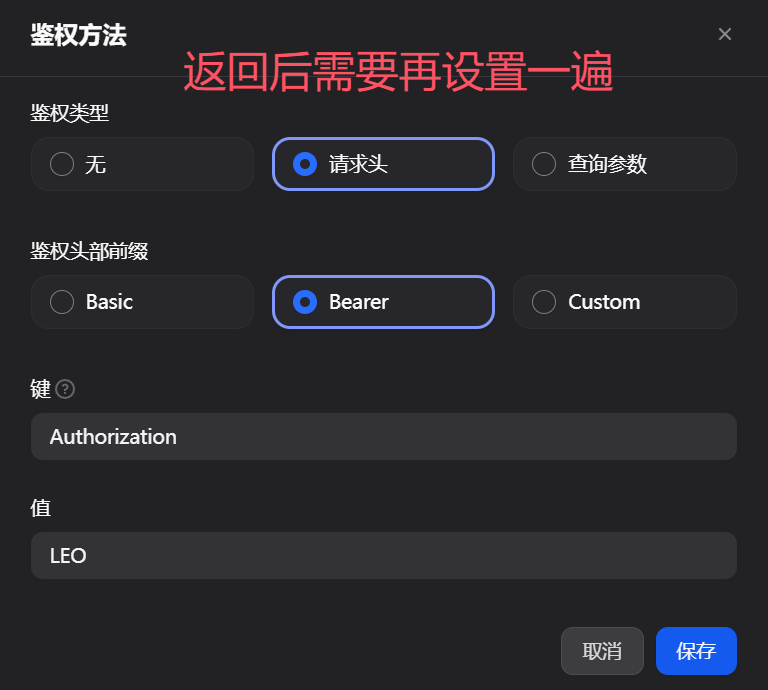
配置认证
在插件配置页面找到「Authentication」→ 选择「Bearer Token」→ Value 输入 LEO → 点击「保存」。
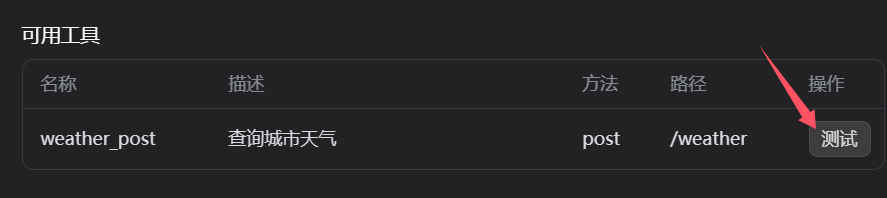
5
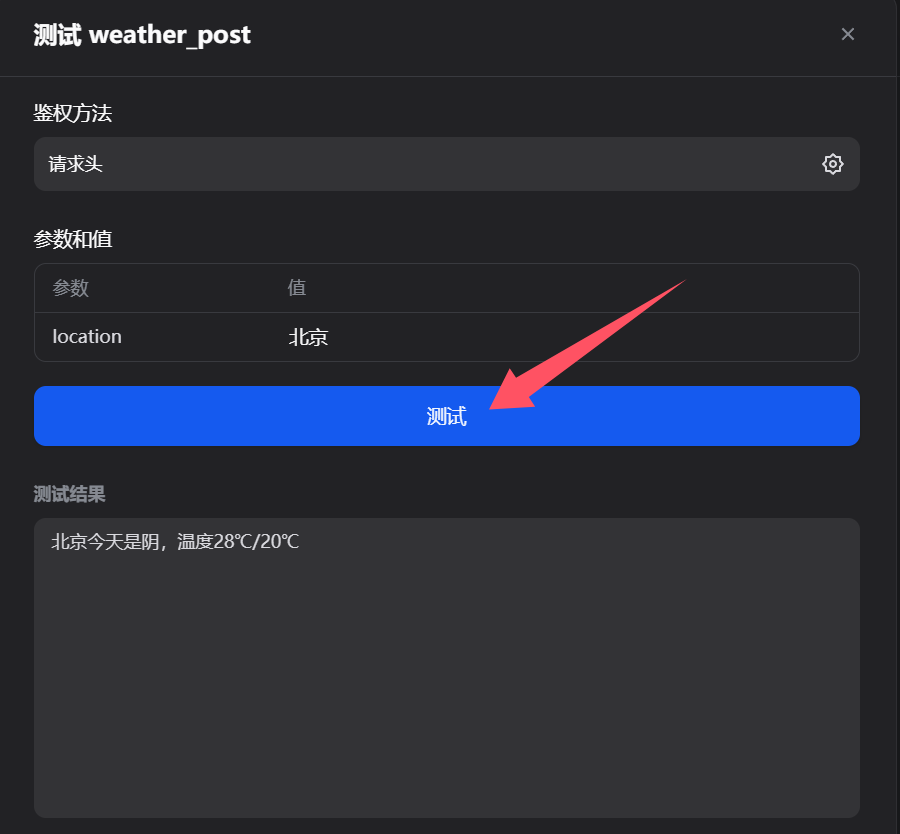
测试插件
在测试区域输入参数并点击「测试」按钮。
json
{"location": "北京"}预期结果:
北京今天是晴,温度33℃/27℃
6
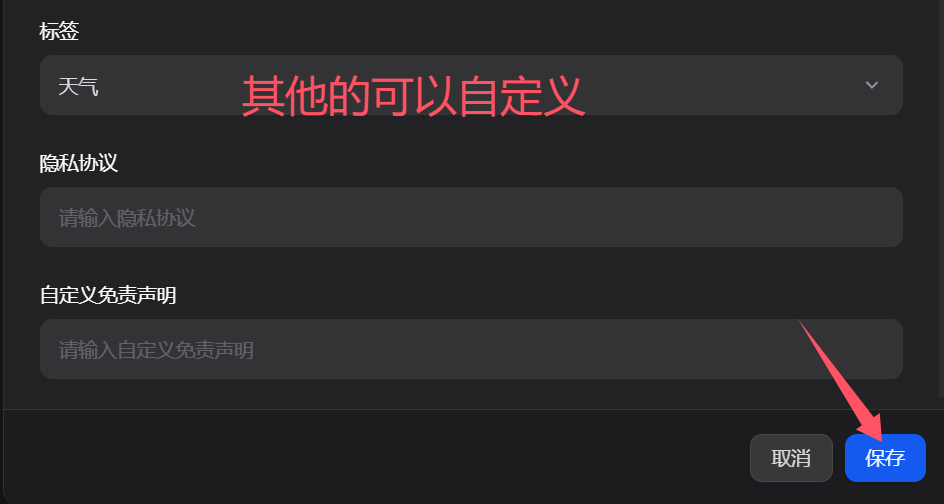
启用插件
点击「发布」按钮 → 选择要启用该插件的「应用」→ 在应用中就可以使用天气查询功能了。
五、在 Dify 应用中使用
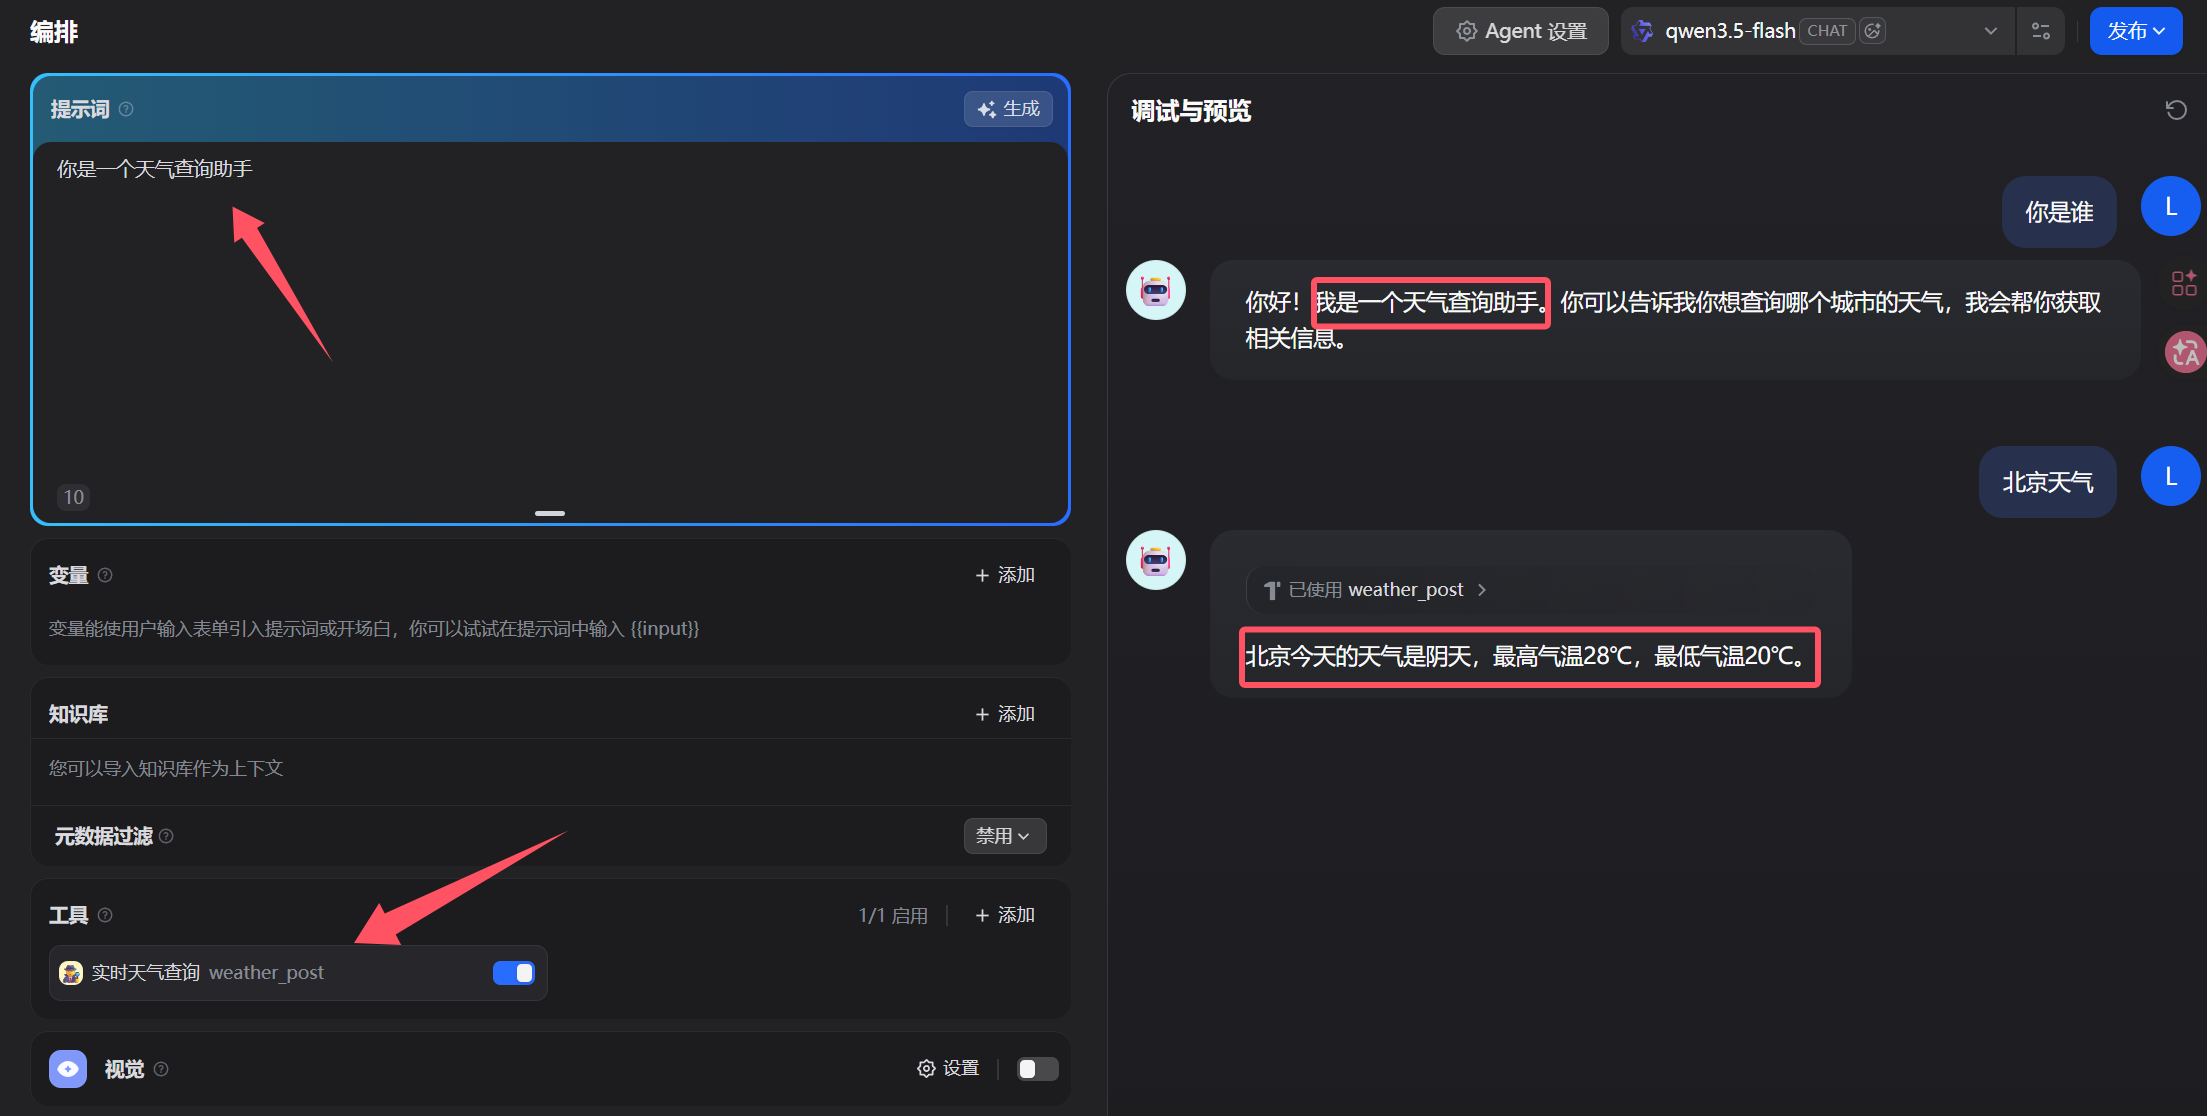
5.1 创建支持天气查询的 Agent
- 创建新应用或编辑现有应用
- 在「上下文」部分添加插件:
你可以使用天气查询工具帮助用户获取天气信息。当用户询问天气时,调用天气插件。 - 在「工具」部分启用刚创建的天气插件
5.2 测试对话
用户输入:
北京今天天气怎么样?
Agent 回复:
让我帮您查询北京的天气...
北京今天是多云,温度32℃/22℃
用户输入:
上海明天会下雨吗?
Agent 回复:
我只能查询当前天气,无法预测明天。当前上海的天气是:上海今天是晴,温度35℃/28℃
六、故障排除指南
常见问题及解决方案
| 问题现象 | 原因分析 | 解决方案 |
|---|---|---|
Reached maximum retries | Dify 无法访问 localhost | 必须使用公网 URL,不能用 localhost |
{"detail":"Not Found"} | 路由路径错误 | 检查代码中是 @app.post("/weather") |
403 Forbidden | Token 不匹配 | 确认 VALID_TOKEN = "LEO" 和 Dify 配置一致 |
| 连接超时 | localtunnel 断开 | 重启 lt --port 8081,更新 Dify 中的 URL |
| 城市未找到 | 城市不在 CITY_CODES 中 | 在代码中添加该城市编码 |
快速诊断命令
bash
# 1. 检查服务是否运行
lsof -i :8081  # Mac/Linux
netstat -ano | findstr 8081  # Windows

# 2. 检查公网可达性
curl -I https://your-url.loca.lt

# 3. 完整测试命令
curl -X POST https://your-url.loca.lt/weather \
  -H "Authorization: Bearer LEO" \
  -H "Content-Type: application/json" \
  -d '{"location": "杭州"}'
七、维护与优化建议
7.1 临时方案(日常使用)
- 保持终端开启:两个终端(FastAPI + localtunnel)需要一直运行
- 每日重启:local tunnel 链接 24 小时后可能失效,每天重启一次
- 快速更新 URL:创建一个脚本自动更新 Dify 配置
7.2 永久方案(推荐升级)
部署到免费云服务 (Render.com)
# 1. 创建 render.com 账号
# 2. 创建 Web Service
# 3. 连接 GitHub 仓库
# 4. 设置环境变量(如果需要)
# 5. 部署完成,获取永久 URL
7.3 功能扩展
更多城市编码
湿度/风力数据
错误重试机制
请求缓存